Are you worried about the longevity of your generator? The low oil sensor is one of the most important things to keep an eye on. This small but mighty component is responsible for monitoring the oil levels in your generator and preventing damage caused by running on low oil.
In this article, we’ll try to share with you how to test a low oil sensor on a generator and ensure that your generator is running smoothly and safely.
Don’t let a malfunctioning sensor lead to costly repairs or even engine failure. So, keep reading this article.
What is the Importance of the Low Oil Sensor
A low oil sensor is an important component of a generator as it helps to protect the engine from damage caused by low oil levels. The sensor works by monitoring the oil level in the generator and activating an alarm or shutting down the generator when the oil level drops below a certain point.
Here are some reasons why low oil sensor is important:
Preventing Engine Damage:
One of the most important functions of the low oil sensor is to prevent engine damage caused by low oil levels. Without the sensor, the generator could continue to run with low oil levels, causing damage to the engine’s internal components and potentially leading to costly repairs or even complete engine failure.
Early Warning:
A low oil sensor provides an early warning when oil levels are low, allowing you to add oil before the engine is damaged. This can help prevent costly repairs and prolong the generator’s life.
Safe Operation:
The low oil sensor helps to ensure the safe operation of the generator by shutting it down when oil levels are too low. This can prevent accidents and protect both the generator and those operating it.
Cost-effective:
The low oil sensor is a cost-effective solution to protect your generator from damage. Replacing the sensor is much cheaper than replacing the whole engine.
Compliance:
Many states and municipalities have regulations that require generators to have low oil sensors to ensure safe operation.

How to Test a Low Oil Sensor on a Generator- Step by Step Guideline
Testing the low oil sensor on a generator is a simple process that can be done in a few steps. Before starting, ensure that the generator is turned off and that all power sources have been disconnected.
Locate the Low Oil Sensor
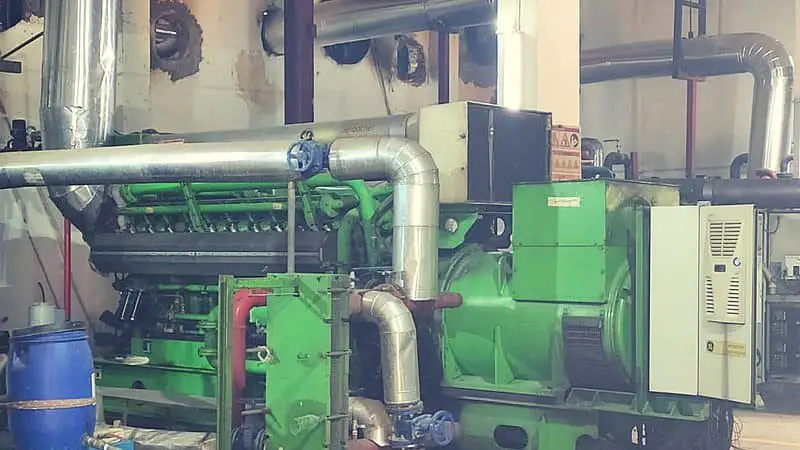
The low oil sensor is typically located near the oil pan of the generator. It may be a small switch or a sensor with wires running to it. You’ll need to remove the panel to get to it.
Check the Wiring
Make sure that the wiring is connected properly and is not corroded. If there is any corrosion, it will need to be cleaned off before moving on to the next step.
Test the Sensor
The next step is to test the sensor. You will need some basic tools for this, such as a multi-meter and wire strippers.
In the beginning, locate the low oil sensor on your generator. It will be a wire or connector located near the oil pan. Check the wiring to make sure it’s in good condition and hasn’t been damaged.
Now test the sensor itself. Use your multimeter to check for continuity. Touch one probe to each wire terminal on the sensor, and then turn on the generator. If the multimeter reads continuity, the sensor is good and you can move on to the next step. If it doesn’t, the sensor is bad and needs to be replaced.
Check the Oil Level
Now that you’ve double-checked the wiring, it’s time to check the oil level. This is an important step as your generator won’t start if it doesn’t have enough oil.
To do this, remove the dipstick and wipe it off with a clean cloth or towel. Reinsert the dipstick and pull it back out to check the oil level. Depending on your generator model, you may need to add a new quart of oil if it reaches the low mark or is running low. Once that’s done, you can move on to the next step of testing the low oil sensor.
Test the Generator
Once you have confirmed that the wiring and the oil levels are working correctly, it’s time to test the generator. Start by turning on your generator and allowing it to run for 5 minutes.
After that, check your oil levels again with a dipstick. If the oil level has dropped lower than the minimum manufacturer’s recommendation, then your low oil sensor needs to be adjusted or replaced.
If the oil level is still in the normal range, turn off your generator and let it sit for 30 minutes. After 30 minutes, check the dipstick once more and compare the reading with what it was before you started running the engine. If there is a noticeable difference in your readings, then it’s time to check your low oil sensor again or have it inspected or replaced by a qualified technician.
Repeat Testing Process
Once you have completed these steps, it’s time to check the oil level again and repeat the entire process. This will ensure that the low oil sensor is working properly and that the generator is safe to use.
You should always remember to take safety precautions when testing a generator: make sure you wear protective gloves, keep a fire extinguisher nearby, and never test a generator while it is running. Additionally, you should turn off the main power switch before testing anything on your generator.
If you find that your low oil sensor still isn’t working correctly after several attempts, it may be time to replace it. Usually, replacing an old or faulty low oil sensor is relatively easy and requires minimal effort on your part. Before shopping for a new one, be sure to consult your user’s manual for the type of sensor that best fits your generator model.
How to Change a Low Oil Sensor on a Generator
You already got an idea of how to test a low oil sensor on a generator. Now, it is important to have an idea of replacing the low oil sensor on the generator. The low oil sensor will alert you when the oil level in your generator is too low. This is important because running your generator without the proper amount of oil can damage the engine and other components. Here are some steps to help you change the low oil sensor on your generator.
1. Before beginning, make sure that you have the correct replacement low oil sensor for your generator. Check your owner’s manual to find the part number of the low oil sensor.
2. Once you have the right part, shut off the generator and unplug it from the power source.
3. Locate the low oil sensor. It is usually located near the oil tank or the dipstick.
4. Unscrew the old low oil sensor and remove it from the generator.
5. Install the new low oil sensor in the same spot as the old one. Make sure it is tight and secure.
6. Once the new sensor is in place, plug in the generator and turn it on.
7. Monitor the oil level to make sure it is at the correct level.
By following these steps, you can easily change the low oil sensor on your generator. Remember to always consult your owner’s manual for specific instructions for your model generator.
Frequently Asked Questions
Q. How do you test an oil pressure sensor on a generator?
To test an oil pressure sensor on a generator, you will need to disconnect the electrical connection to the sensor and then use a mechanical pressure gauge to measure the oil pressure of the generator. After that compare the mechanical pressure gauge reading with the reading from the oil pressure sensor. If the readings are not the same, the oil pressure sensor needs to be replaced.
Q. How do I know if my generator oil is low?
If you want to determine whether your generator oil is low, you will need to check the oil level with a dipstick. If the oil level is below the minimum mark on the dipstick, then your oil is low and needs to be topped up.
Q. Will a generator shut off if it’s low on oil?
If the oil level is too low, the generator may shut down. Generators will still start with low oil, but newer models have a “generator low oil shut off sensor” that will automatically kill the engine if the oil level gets too low to prevent running the generator without oil.
Q. How do I know if my oil pressure sensor is low?
If your oil pressure sensor is low, you will most likely experience one or more of the following symptoms: engine stalling, loss of power, engine misfires, and/or oil light coming on. Whenever you suspect that your oil pressure sensor is low, you should check the oil level and pressure using a gauge, and then have a professional mechanic inspect the sensor and oil system.
Final Thought
If you’re ever unsure whether your low oil sensor is working, you now know how to test it. Just be sure to follow the proper steps, and you should be able to test it without any problem.
Hopefully, our small effort will be helpful for all of you to know how to test a low oil sensor on a generator. And, of course, if you do have any problems, be sure to consult with a professional. Thank you all.